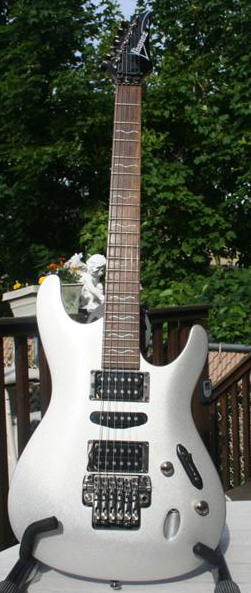
I bought a Silver metalflake Ibanez 470S off of Craigslist. The guitar was in good shape, but had a chip in the paint on the bottom corner of the guitar. At first, I tried to fix it, but couldn't get an EXACT match. Since it wasn't exact, it bothered me. So, I decided to strip it and paint it.
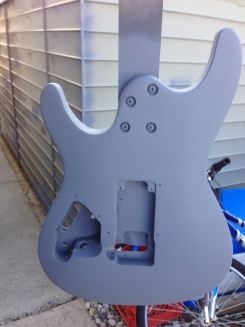
I completely stripped the paint off, except for some areas in the cavities. I knew I was going to be spraying them black, so I wasn't worried about it.
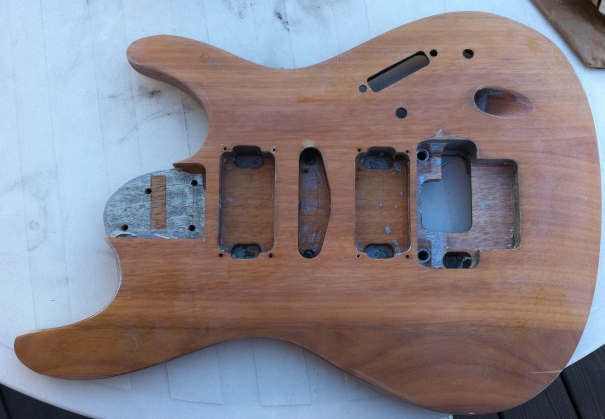
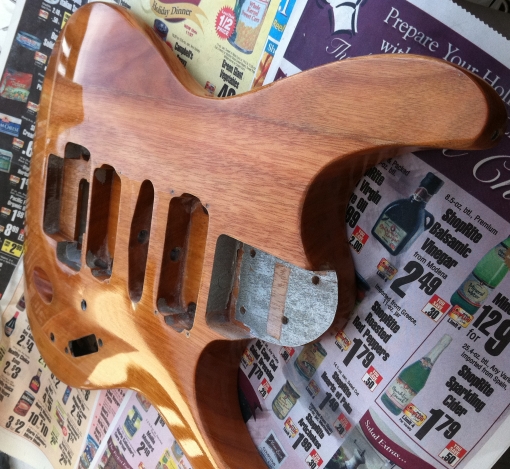
Once I saw the guitar stripped, I wondered how it would look with the wood treated with Tung Oil. After applying it on a small area on the back of the guitar, my whole outlook changed. I made the guitar completely bare with Tung oil finish.
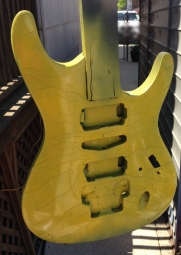
After a couple of years, I had a small scratch in the surface of the guitar. Since there wasn't any clear coat on it, I couldn't just buff it out. So, I tried applying more Tung oil to the area, but it simply couldn't match the existing aged tung oil look. It was back to the sanding. I then figured that I had nothing to lose, lets really go for it. I sanded it and did a primer coat.
After the primer coat, I did a quick black base coat. But I soon found that the wood was VERY pourous. I had to sand it down again, and added some wood fill. I then sanded it flat. Put another primer coat and another black base coat. I then created a stencil, based on one I made several years ago for a Kramer body, based on one of my guitar heroes, George Lynch.
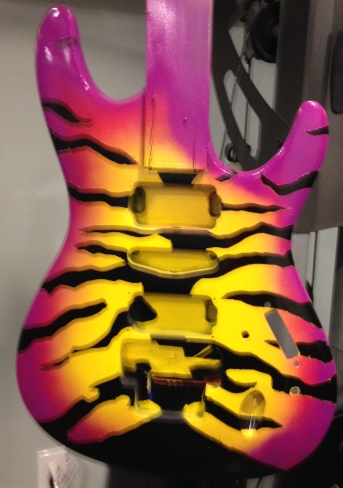
Since the Ibanez was a smaller body, I had to make adjustments. Next came creating the stencil, by putting painters tape on a clear acrillic board. I then put the stencil over the tape and used a pen to punch holes in the stencil, which made divot marks in the tape. Next I would use an xacto knife to cut out the stencils and put them on the guitar.
It took about 2 days (off and on) to completely finish the stencil and put it on the guitar. It's very tedious, but it was something I wanted to do, so I stayed with it.
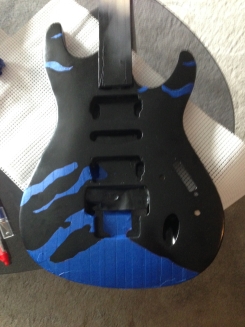
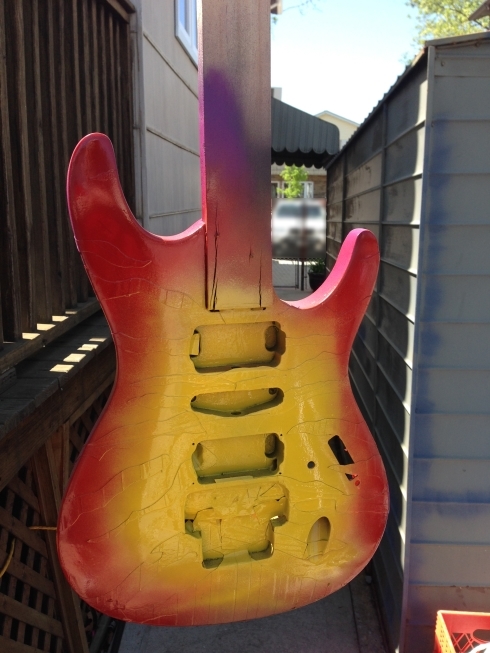
Now came the most intense part. It was one of those "get it right, or start over" moments. I started with the yellow coat. I did the whole front of the guitar. In hindsight, I should have done much less on the edges, since they were going to be "bursted" in darker colors.
Next, I put a light layer of red around the edges. I made sure the come in toward the middle a little more with the red, so that it would show through after any other colors.
After the red, I did the edges with the plum. I was careful not to overspray, to leave some red between the yellow and plum.
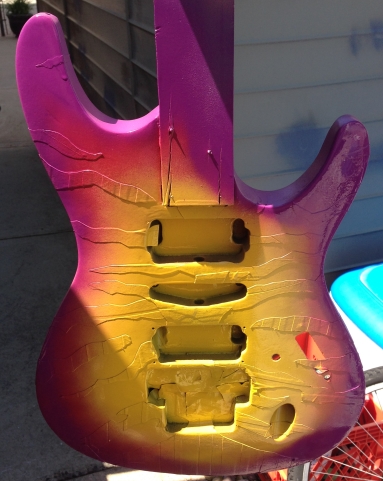
I let the guitar dry for about 40 minutes and took off the tape. This is where I realized that I shouldn't have painted the yellow near the edges. After pulling the tape off, I noticed there was a very thin, but noticeable layer of yellow under the plum. After letting the guitar dry for about a week, I used a thin sharpie around the stripe edges to cover the thin yellow under the plum.
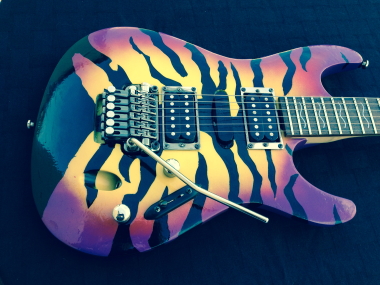
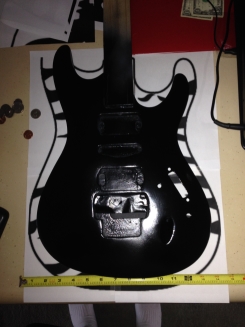
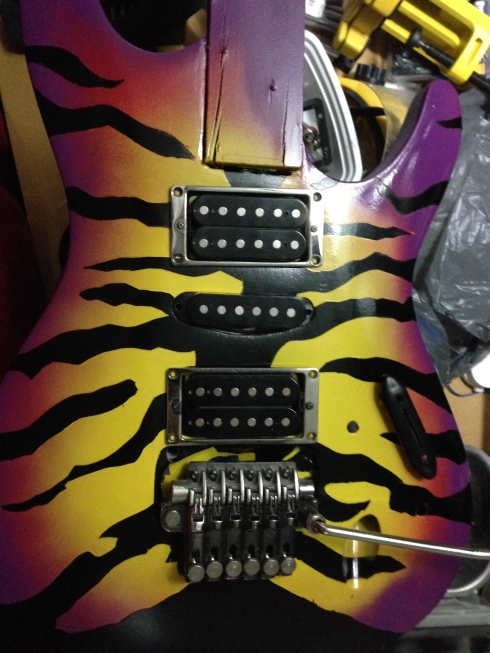
I was very nervous that it would run once I started putting on the clear coat. I waited another week, to make sure the existing paint cured (as well as the sharpie). Just in case the sharpie ran, I wanted to see what it was going to look like when done. Before starting the clear coat, I carefully laid the pickups and the ZR tremolo in the body and took this picture.
I applied a couple of VERY thin clear coats, to try and get a layer over the sharpie marks without running. Thankfully, it worked!!! I spent the next 3 weekends adding clear coat after clear coat. The only reason I stopped adding more then 30 more clear coats was that a bug landed on the back and got stuck there. I removed the bug, and let it cure for about 3 months. Then I wet sanded it for quite a while, buffed it out using 3M Paint Restoration System and here is the end result.

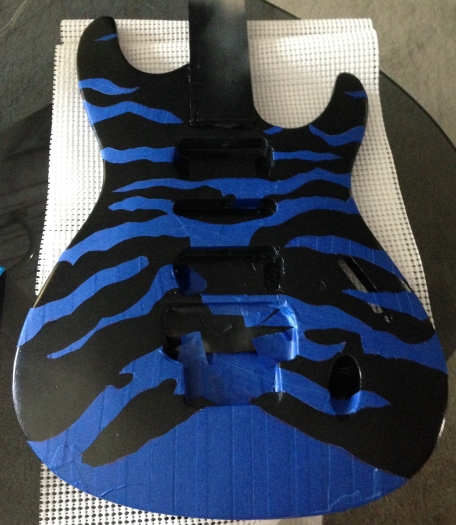
Here is a side view of the guitar before buffing.